
Add the Skin Test to your theme
The Skin Test reaches your storefront through the Dermaself theme app extension. You turn it on and style it in the Shopify theme editor: the app never edits your theme code.
You need an Online Store 2.0 theme to place the button inside a page. On older (vintage) themes the floating button, menu links and JavaScript still work.
1. Turn on the Skin Test loader
The loader is required: without it, no button or link opens the Skin Test.
- In the app, open Publish and click Turn on the loader. The theme editor opens with App embeds and the Skin Test loader already selected. Or go to Online Store → Themes → Customize → App embeds yourself.
- Turn on Skin Test loader.
- Adjust the settings if you want (see below), then click Save.
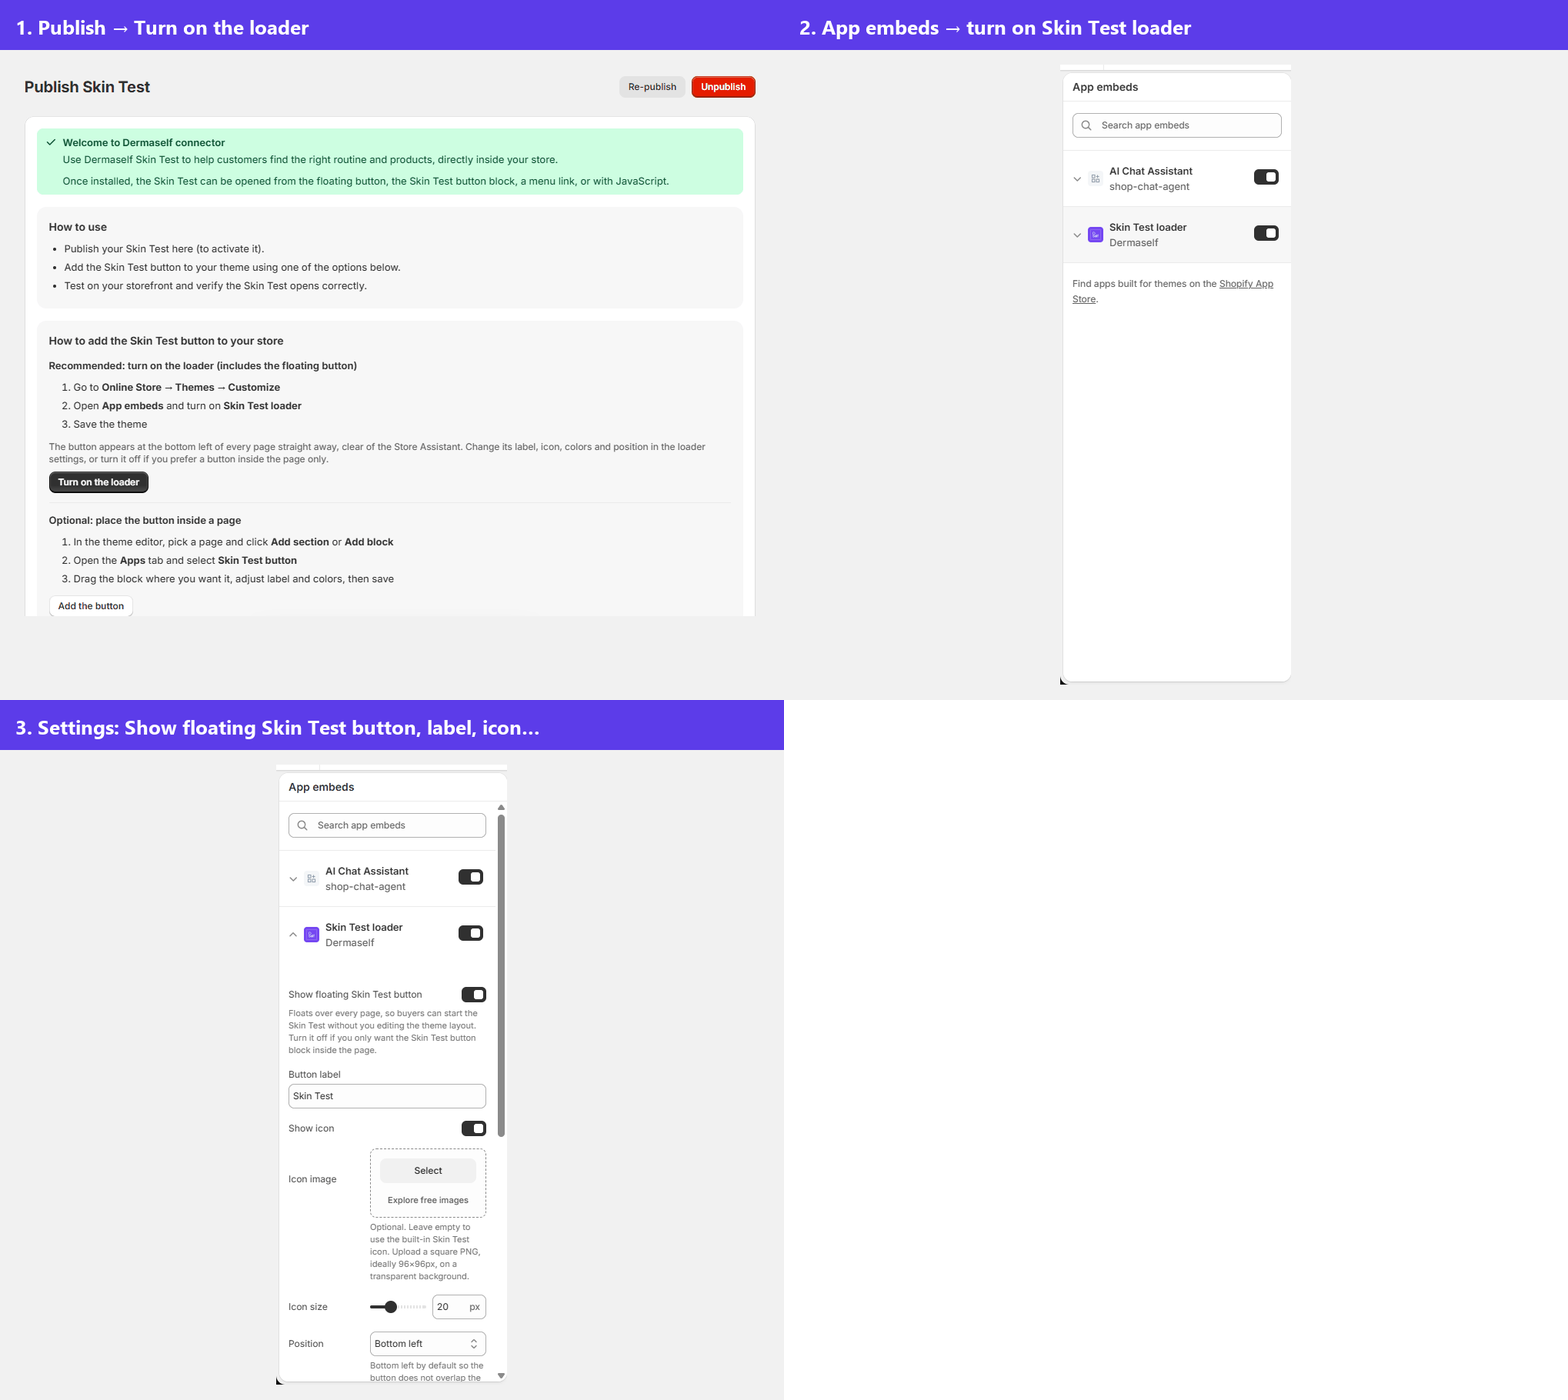
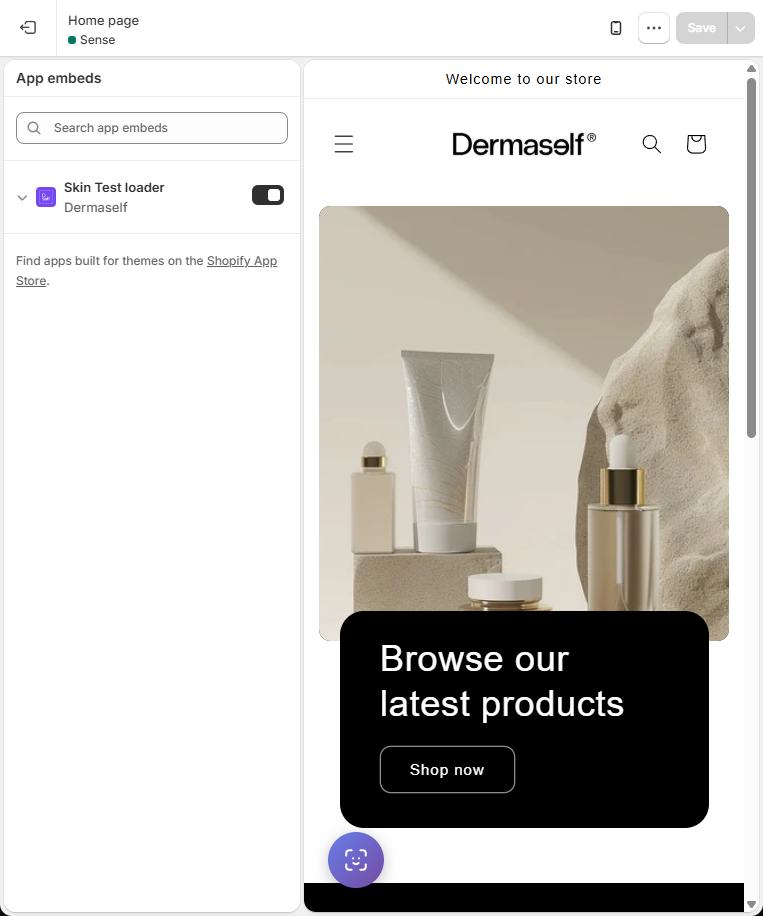
If you do not save the theme, the loader stays off on the live store.
2. The floating Skin Test button
Show floating Skin Test button is on by default: a floating button appears at the bottom of every page, without changing your theme layout.
Its settings are in the loader:
- Button label, Show icon, Icon image (optional square PNG, ideally 96×96 px), Icon size
- Position: bottom left (default, so it does not cover a chat or the Store Assistant) or bottom right
- On mobile: icon only, or icon and label
- Distance from the side, Distance from the bottom
- Gradient start, Gradient end, Text color, Font size, Corner radius
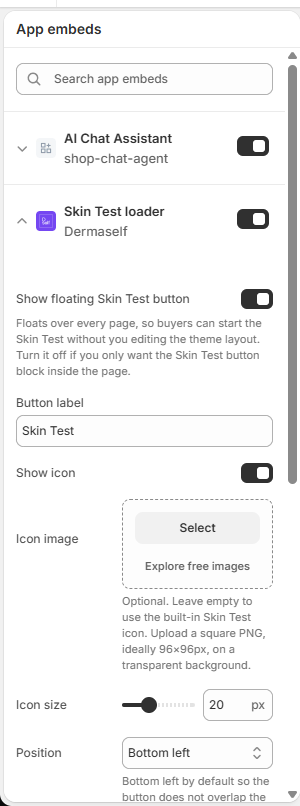
Turn Show floating Skin Test button off if you place the button inside a page instead. Keep the loader itself on.
3. A button inside a page
- In the app, open Publish and click Add the button, or open the theme editor on the page you want (for example the home page).
- Click Add section (or Add block inside a section) → Apps tab → Skin Test button.
- Drag it where you want it, set the options, and click Save.
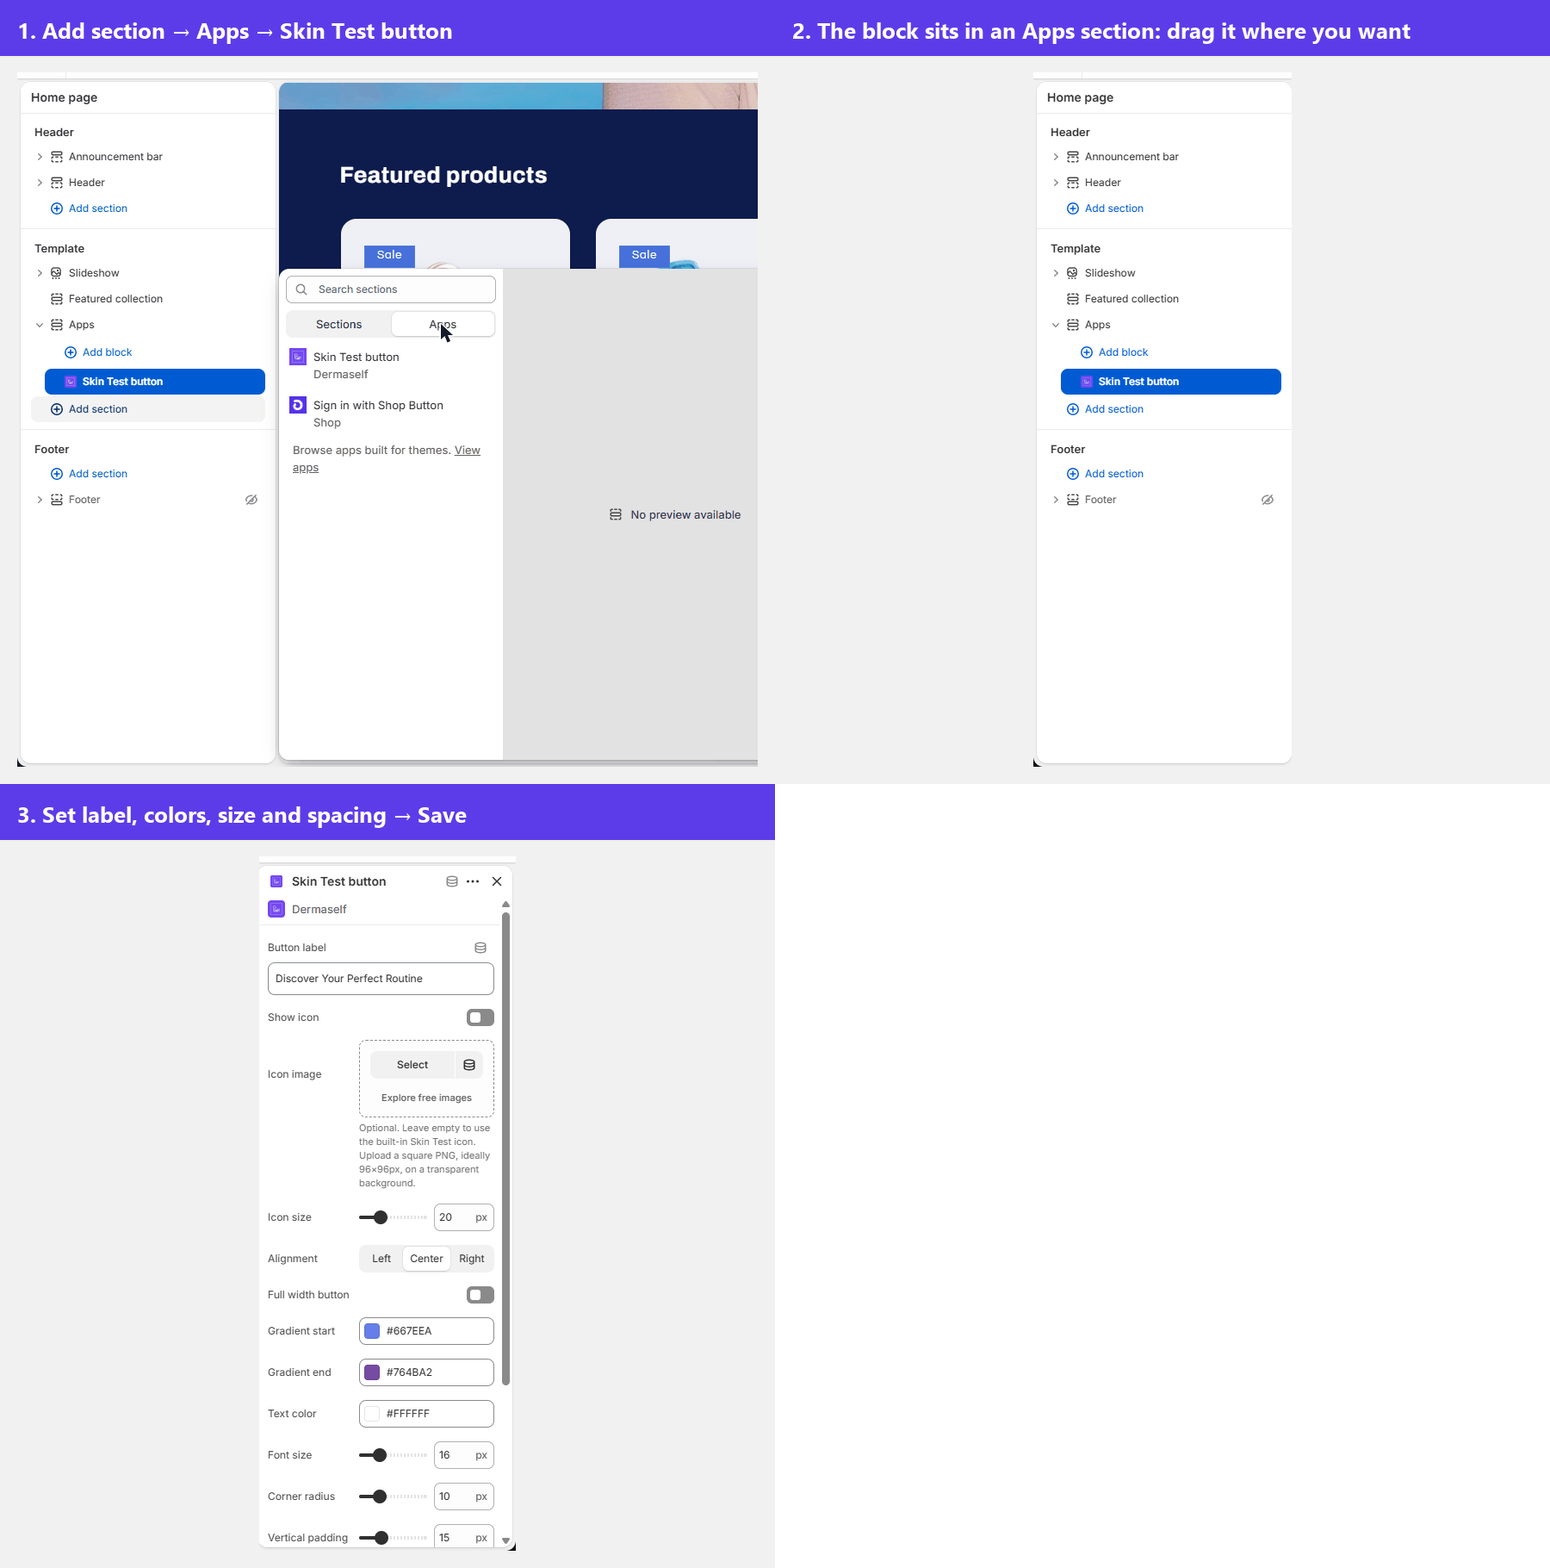
Block settings: Button label, Show icon, Icon image, Icon size, Alignment, Full width button, Gradient start / Gradient end, Text color, Font size, Corner radius, Vertical padding / Horizontal padding, Top spacing / Bottom spacing.
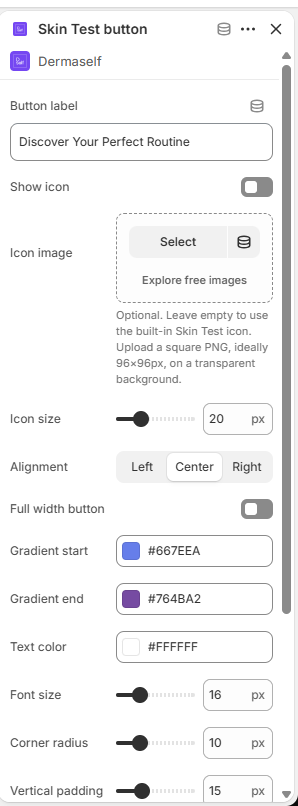
For extra styling or positioning, use the section’s Custom CSS in the theme editor.
4. Translate the button label
The button label is a single text field. To show it in every store language, use Shopify’s Translate & Adapt app: open Theme, find the template where the button lives (for example Home page), then Skin Test button → label, and enter the translation for each language.
5. Menu links and custom buttons
- Menu item: in Content → Menus, add an item whose link ends with
#dermaself-quiz. Localized URLs work too, for example/it#dermaself-quiz. - Any link whose URL ends with
#dermaself-quizopens the Skin Test. - Any element with the
data-dermaself-quizattribute opens it on click. - JavaScript: call
openSkinAnalysis()from your own button.
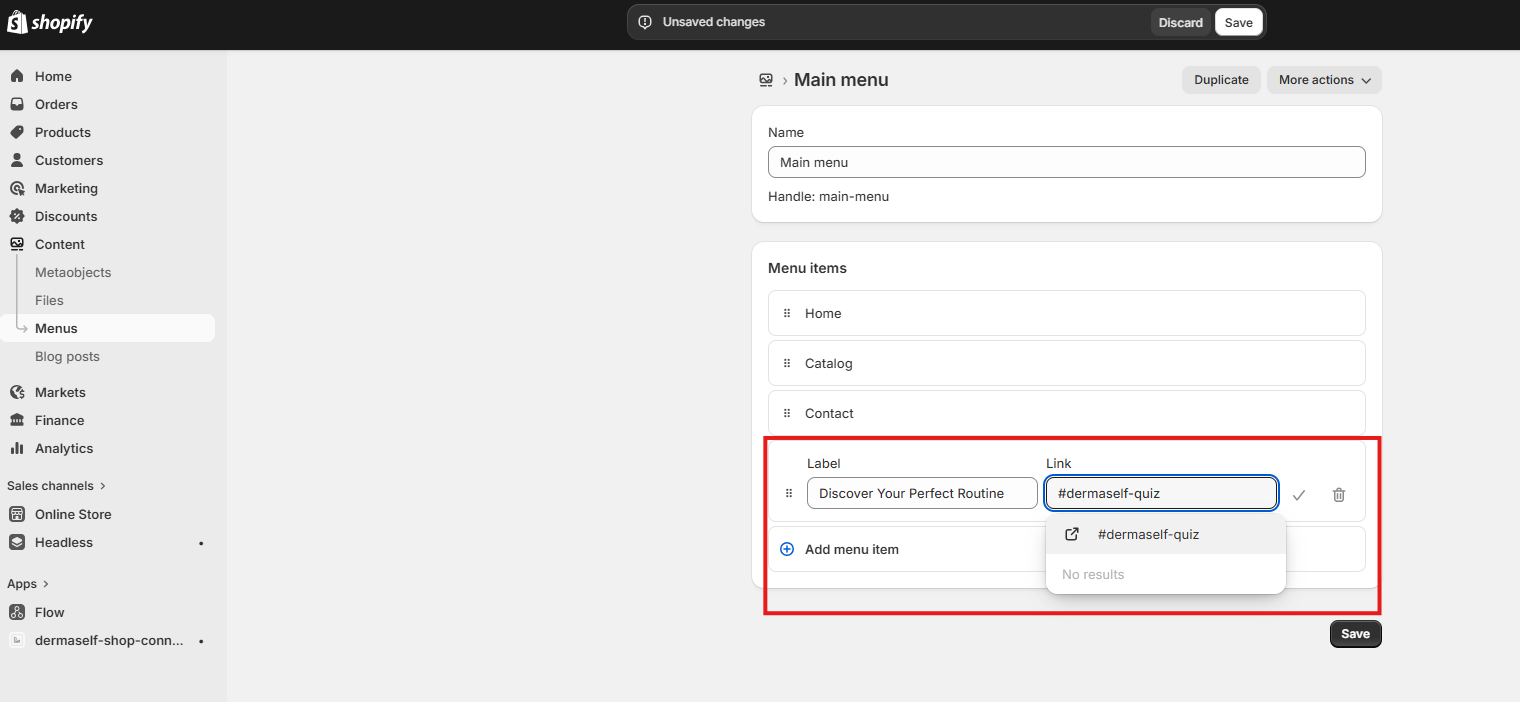
All of these need the Skin Test loader turned on.
6. Publish
In the app, open Publish and click Publish: the Skin Test is on for shoppers.
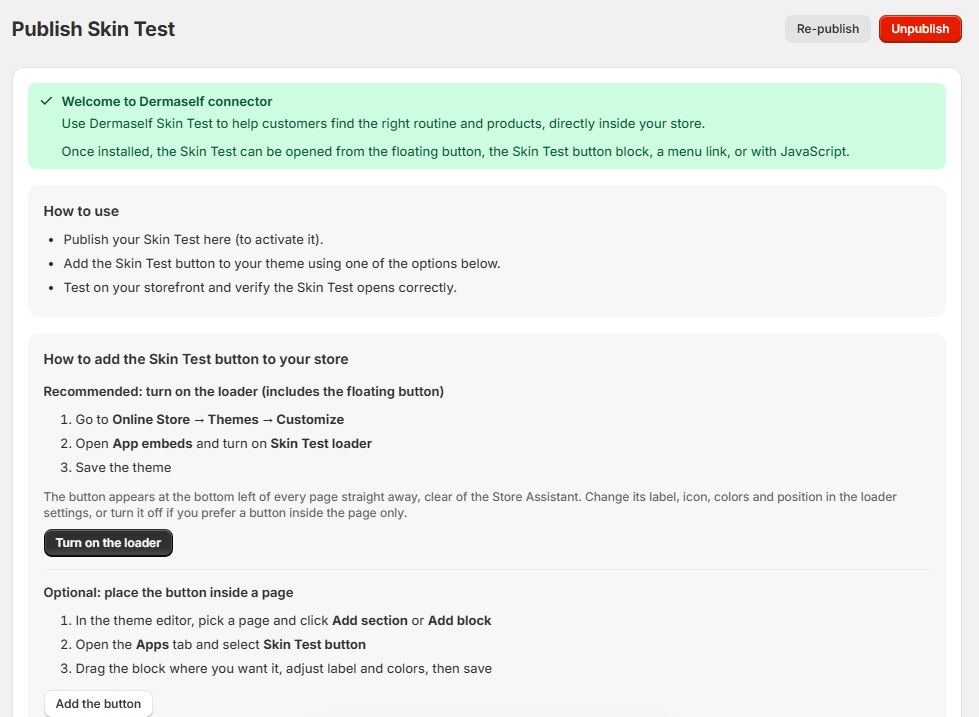
- Unpublish takes the Skin Test offline. The button stays in the theme, but the Skin Test shows as unavailable.
- Changing the button label, colors or position is done in the theme editor: save the theme, no need to publish again.
7. When the Skin Test is unavailable
Shoppers see an “unavailable” panel instead of the quiz when:
- the Skin Test is unpublished;
- the Free plan used its 25 analyses for the month (it comes back next month, or when you move to a paid plan);
- the plan is not active.
See Plans and usage.
Test it
Open the live store in a private window, on desktop and mobile, and complete a Skin Test. The flow is described in Shopper experience.